Exterior Paint ~ Almost Finished

Tuesday, May 31, 2011


 After a month and a half up in Washington, my Dad finally returns tomorrow to help pack up the ranch in Waterford, California and begin the official moving process up north.

  This one here is of one the side entrances to the house.  The decided to go for a black door (which I quite like).  The original plans were do to do a dark forest green, but after some tests on the window frames, everyone pretty much agree the black popped and looked far more handsome.

See picture before where you can see the forest green to the left, and the black window frame to the right.  The black is much better!

Forest Green    vs    Black

Refinishing the old doors

Saturday, May 28, 2011


  As you may have seen in some of the pictures we've been posting (see here for original door picture), the doors are all pretty awful looking.  They're sturdy though, heavy solid wood doors.  Worth keeping.

  My Dad set to work removing them and sanding them down, according to him, the old gluey stain became so gummy, it was actually clogging his sander.

  He did however manage to sand them all down, and refinish them.  Though I haven't seen them for myself, I can tell from the photos it's a huge improvement.

 He also purchased some vintage hardware (from link provided to the right of our blog) to keep with the old Victorian feel.  Can't wait to see the finished product hanging!

Exterior Paint ~ Wow, it's really coming together!

Sunday, May 15, 2011


  Received this picture yesterday from my Dad.  The paint job is really coming along nicely.  The lighter brown trim was actually a last minute change, as originally it was set to be a dark Cherry-wood color.

  It's interesting how everything is finally coming together, the yellow on the top shingles and the olive on the bottom.  I mentioned to my Dad the the brown unpainted shingles on the bottom portion of the house (where the basement begins) actually can remain the color they are, the seem to blend nicely with the brown trim.  A happy accident.

  Unfortunately there has been nothing but rain the past few days so the painters haven't been back in awhile.  Already though the neighbors stop and admire the house, they're so excited to finally see this old Victorian get the love it deserves.  As our neighbor Audree said, "It's good to see her with her knickers back on!  She's been naked for so many years!"

This is a a larger picture of the side part of the house (not street facing).

Finally a clear day for painting...

Tuesday, May 10, 2011

   Well currently my Dad is the only one up in Port Townsend working on the house.  He's spent majority of his time there working on getting all the baseboards up and other random things like chair-rails and moldings.

  It's been pretty rainy these past weeks, but finally some clear days have come and the painters have been busy!

Here is a picture of the main body in the Ochre (or "olive drab") with the light Yellow on top.

This shows one of the trim colors (the Vic is getting a four-color treatment), this is a light Cherry-wood brown, with another darker reddish brown (AKA Japanese Maple), and a lighter Cream (not pictured yet).

The Day The Trees Came Down

Thursday, May 5, 2011

"Who leaves the pine-tree, leaves his friend,
Unnerves his strength, invites his end.
."
~Ralph Waldo Emerson


     Well, with that said, I guess we've now officially invited our end.  Yesterday two pine trees we're sadly removed from our yard.  Not without great thought and care.  The trees were not incredibly old, they were planted by previous owners.  They were becoming a menace however, they were growing so large and fat, it seemed like one side of our house was being buried by them both.  So the decision was made to have them taken down, and surprisingly...it was to our neighbors delight.  They agreed the trees had gotten too big and they were dominating the skyline.  We do feel rather awful about it, one does not make these decisions lightly.


My Dad sent me these photos from his phone. 
Check out the pattern inside one of the pine trees stump.
Looks like we may have cut down a holy tree!
What the house looks like as of yesterday.  Both trees removed from the right side of this photo.  You can see the painters have finished priming and caulking the house.  A few color samples painted near the bay window too!  Sneak peak at what's to come!

Chair Rail & Baseboards

Tuesday, May 3, 2011


   My Dad and I spent the better part of 4 weeks getting the staining done for the chair rail.  Lots of trips to Home Depot, and many sample stains later we're finally satisfied with the color match.


   We had ripped out the previous owners baseboards (they were huge and made the rooms look smaller), so this is the first time we've really seen rooms with all the proper moldings, chair rails, and baseboards up.  It's a wonderful thing when things finally start coming together. :)

You can see Johnny worked day and night on this project.  Of course the staining took forever, but the cutting moldings and baseboards to fit smoothly together is NOT an easy task either.


Final product, this picture is of the Parlor.  The baseboards in the other rooms of the house were painted to match the color of the rooms trim. 

The "Library"

  On the last couple days we were all up in PT, Missy picked out colors (as a surprise) for the Library/Office.  This is a small room located in the very back of the first floor, connected to the kitchen.  It's not a huge room, it was added later on and was not part of the original house design.  It tends to be on the darker side, as it only has 1 window.

   Originally this room had carpet, which my Dad and Missy spent our first days up together tearing out.  Missy spent hours on the floor, hand removing every carpeting staple they'd placed in the floor.  My Dad and I tossed the old rolled up carpet through the window, and it felt really good to be rid of that old thing.

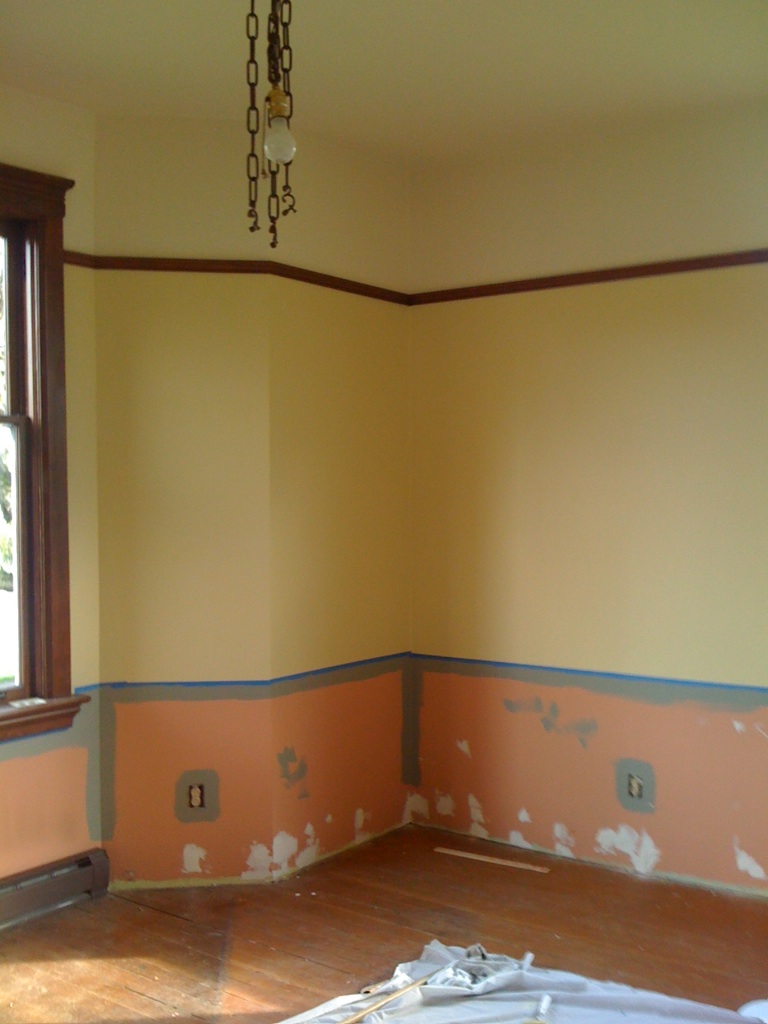
   The room itself is painted in the same drab taupe that the entire kitchen is painted in.  The moldings were also painted, so instead of keeping them, Missy decided to just remove the moldings and start fresh.  She set to work removing the old ones and preparing the room for new paint.

With the moldings all down, and the paint procured from Home Depot, Molly and Missy worked together on painting the Library.  Missy decided on Martha Stewart Geyser for one wall and part of the ceiling.  The opposing wall was done in a much darker almost teal blue called Washed Denim.

  At first, my Dad and I were both suspicious.  My Dad always hates having ceilings painted, and almost all the ceilings in this house were painted!  We spent majority of our first few days here painting over that awful rose color the entire parlor and great hall were painted in.  So a compromise was made, only one small portion (pictured to the right) of the ceiling was painted, the rest will be in our classic Behr Cottage White.

   The Geyser color seemed a bit too bright at first, but luckily it dried into a nicer calming tone.  My personal favroite, is the Washed Denim, it's such a fantastic color, it really pops.  Wish I'd done the upstairs bedroom with it!

  After a few weeks, my Dad got the baseboards all in, he went with a white baseboard.  Just to give us a better idea of what it looks like in there he sent this pic to me via his iphone.  It's of the library with what little future we have up there at the moment.  One of the two patio furniture they bought, and the new rug (which is actually going in the dining room), but it was great to see it against the new blues.

The new rug pictured with some random furniture (temporarily in the library), but meant for the Dining Room.

"I don't want to do this anymore"

Wednesday, April 27, 2011

  So few days ago, Missy and Molly were out shopping for house-hold items and I got the crazy idea to attempt installing the chandelier they'd brought all the way up with them from Modesto.  I looked at my Dad and said, "Wouldn't it be cool to have the chandelier installed before they get back?"  I mean, after all the red in the dining room was finished, they were bringing back a beautiful rug they'd picked out from Macys a few days prior.  It just made sense to get that thing installed.

Regret set in once we'd carried the crazy shaped box into the house from the garage, I began opening layer upon layer of pieces, instructions, and hardware.  I look up at my Dad and say, "I don't want to do this anymore, let's save it for another day."  My Dad laughs and says, "Nah, I think we can do it."  It was already 5pm (quittin' time), and I was exhausted from painting all day.  But, I got up and began unwrapping all the pieces.  My Dad gathered his tools, and we set to work understanding this badboy's installation.  Since the hole in which to wire the chandelier up into the ceiling was so small, I had to be the one up on the ladder.  My Dad's fingers were too big and his eye sight not as good.  After some brief explanations on electricity and wire caps, etc., we began installing.

  Now, I won't go into all the painful details here...but imagine lots of awful things happening.  Lots of failed attempts, wrong hardware, unscrewing, re-wiring, arms shaking, fingers numb, sweat dripping.  You get the idea.  The whole thing must have taken us three hours or so.  My Dad ultimately saving the day by taking a chandelier not meant for our ceiling, and making it work by using his own ingenuity.


  Missy and Molly were wowed by the chandelier and extremely happy to see it up.  I believe we all thought it might have stayed in the garage for quite awhile before someone finally caved in and installed it.  The next day Dad bought nine 25 watt bulbs, which I got up on the ladder and screwed in, and a dimmer switch which added the real "wow" factor.  Missy said, "It makes them look like old gas lamps."

Barn Red?! More like Barn Magenta!

Tuesday, April 26, 2011

   Molly continued to work on the dining room all day Tuesday, it was discovered that one coat of Martha Stewarts' "Barn" over a grey primer, creates a sort of magenta look.  Which was not what Missy wanted at all.  We were all beginning to think this was possibly a wrong color choice, but regardless, two coats were going to be needed, ugh (Guess the primer wasn't enough).

     We'd only bought one gallon and that pretty much covered the room, so once one coat was on Molly set to work on other projects.  She did however come back to paint one section with a second coat so that we could all get a feel for the finished/dry color.  It did still have the effect of a slight pinkish undertone.  But my Dad and I had decided it was due to the blue tinted plastic the exterior painters had tapped over the windows.  That light blue hue was just enough to create a difference in the color.  Missy decided to sleep on it, and make up her mind in the morning whether or not a new color choice was in order.  Either way, another gallon of some kind of red would need to be purchased from Home Depot in the morning. Which is a journey onto itself as the nearest Home Depot is in Pulsbo, nearly 50 minutes from us in PT.


   By morning the paint had fully dried and the section that had received the double coat was looking perfect.  It dried into the red Missy was hoping for and we all had a huge sigh of relief.  That morning Missy and my Dad took a trip down to Home Depot to pick up more paints (including colors for the "Library"), and check out some area rugs for the house at Macys.

Mary/Molly's Room ~ Take II


Originally, I (Mary) was given the choice of what color to paint the room upstairs that was going to be officially the room of Molly & I when we were home visiting.  Since Master Bedroom was blue, and the Victorian Bedroom had a complex tri-color scheme.  I thought going with a more calming color would be nice for this room.  I picked Behr Rejuvenate with a Cottage White trim (thought it's hard to tell in this picture, it's sort of a light sage green).

However...

I was somewhat bored with the color.  Though it was nice, it seemed to be lacking that real "WOW" factors that all the other rooms seemed to have. So to jazz it up a little more, I discussed adding a possible accent wall color with Molly.  So with her input, we chose Behr Egyptian Nile.


Again, apologize for the awful cellphone picture.  But I painted these two walls with the new darker green, leaving the portion above the molding the Rejuvenate green.  The opposing walls are also still just Rejuvenate.  The room has transformed and Molly and I couldn't be happier.  Molly's large dark wood canopy bed frame will look beautiful against this dark green.  We're very pleased. :)

Painters Set to Priming

Molly pictured in front of the house filming after they'd almost finished priming.  Good thing too, that very night it began to rain!  The primer is oil based, so water doesn't absorb into the exposed wood.
Interestingly, the primer only carries a tint of the color choice we actually made, so now the house looks like a custard yellow (not the color we chose at all) and all the neighbors walk by looking ever-so worried.  
It's kind of funny.  Can't wait to see the real colors!

Molly Arrives, Woo-hoo! (By Mary)

Monday, April 25, 2011


   Molly is my 20 year old step-sister, and Missy's eldest daughter.  She recently graduated from Vancouver Film Academy and spent her first days in the north-west in Vancouver visiting old friends.

  She arrives Monday morning, fresh and eager to begin painting the living-room (a room we all saved for her upon her request).  The living-room will be the only room done up in a more Gothic Victorian style.  Dark colors, a new dark chandelier, darker furniture, and a beautiful deep navy, gold, and red area rug.  It has definitely been the room everyone has been waiting to see come together.  The paint choices were Behr Cottage White on the top (ceiling included), and from the Martha Stewart Collection, Missy picked Barn (a deep red).  The paint guy at Home Depot recommended we do a grey primer first, as reds can take several coats to appear their desired color.  Reds apparently, are notoriously difficult, as we found out as well.

   By late Monday night she had finished her first coat of the grey "gripper" primer.  I was truly amazed, she worked throughout the day without any breaks!

Book Reviews: 'Victorian Exterior Decoration: How to Paint Your Nineteenth-Century American House Historically'

   Since the start of the escrow on our Victorian house Missy and I have started researching Victorian houses and the history that led up to that era, 1860 to the turn of the century.  I listed here a short review of some our current favorites, and a few other books on renovation and restoration.  This is only the tip of the iceberg, we will have more to come. 


Victorian Exterior Decoration: How to Paint Your Nineteenth-Century American House Historically  by Roger Moss and Gail Caskey Winkler. Published in 1986 and available at Amazon.com.

   I listed this first because it is the best! A must read for all you Vickies out there. Very well written with lots of pictures, charts, and floor-plans. It explains why the Victorians painted their houses the way they did, new trends and limited color pallets that was available.  It is extremely detailed, including accurate hardware, fabrics, and furniture.  Great stuff and a must read.

Day 2: Happy EASTER!

Sunday, April 24, 2011

   After a slow start by me, I awake to Missy and my Dad discussing furniture placement and paint colors.  I have some breakfast and get them to agree on some colors for the downstairs bathroom so I can get to work painting it.  The floor is a black and white checkerboard pattern and since it's not in bad shape they decide to keep it and pick colors to go with it.

The old colors were a light powder blue on the main lower portion, darker blue trim, and a off-white for the top/ceilings (see picture below).  Looks like there was some water damage in here and pieces of drywall were cut away and replaced.  Not to mention some water damage stains on the ceilings.  I got to work taping everything off while Missy and my Dad head to Henry's Hardware to pickup the colors.


They picked out a Gunmetal Gray for the bottom, black for the trim, and a brighter white for the top.  Since there was so much to paint, and a lot required my waiting on it to dry before taping off for the trim, I didn't get as far as I'd have liked.  I finished the top and the ceilings, finished all the dark gray, just waiting on everything to dry before I can finish up with the black trim.


Working on the baseboards, day 3 of painting this bathroom.  We weren't sure if we wanted the baseboards also in black, but as you can see the black is much cooler looking!

Update: 4/27/11


  By Monday I had completely finished the trim work.  However the touch-ups required were insane!  I spent the next few days with tiny brushes fixing where paint had leaked through the tape or tape removal had removed some paint!  Ugh.  It's finally complete though.  I highly recommend using Frog Tape for any and ALL painting endeavors, the difference is incredible.

Port Townsend, Part II (by Mary)

Saturday, April 23, 2011

  Wow!  So much has happened.  Most of it too boring to go into details about.  Most importantly, we made it to Washington all in one piece, and by we, I mean Missy, Molly, my Dad, and myself.

  We were greeted by many a'neighbor this morning, so many people curious as to what the new kids on the block will decide to paint their house.  The painters have officially finished all their grinding and taping and are ready to start priming.  Andy has finished all the upstairs flooring, including taking care of a major issue involving the removal of the carpet in the upstairs hallway (more on that later).

  For now, we've been taking some much needed rest (Missy & John are currently napping upstairs).  I've been assessing what I'd like to tackle first, and Molly took off to Vancouver to visit some friends (returning in a couple days to help paint the dining room).  Missy has packed all kinds of new light fixtures and small furniture pieces, like tables and chairs which we unloaded this morning.  Which is a nice place to start when moving considering we only had 1 table up here and it's being used for our computer at the moment.  Although as my Dad and I have discovered, empty boxes make for great tables too!  So as of right now, I've been shifting through boxes and finding out what exactly needs doing.

  Also arriving with Missy was their growing collection of books regarding renovating and decorating Victorians.

  The books have been great inspirations for color choices, not only for the interior but for the exterior as well.  Turns out, Missy loved the paint-job on the upstairs room (labeled Bedroom 2, with the Behr Fossil Butte, Quiet Veranda, and Japanese Maple) so much that she immediately thought of it as a great color choices for the outside.  Which, after I'd painted had similar thoughts.  I loved the tri-color theme, it's one of the favorite rooms in the house.  So, after a meeting with the painter regarding the colors, it has been pretty much ironed out that the main body with be a dark greenish/yellowy ocher color (Fossil Butte), with a lighter ocher for the top (Beachwalk), and a dark red/brown for trim (Deep Cherrywood).  We were all in unison on the color choices for once, including the painter...which is a big deal, as he paints old Victorians often and has seen many of bad choices and "What were we thinking?!" moments.

  Oddly enough, one of the books my Dad had purchased recently through amazon regarding old Vics actually has our exact model inside.  Pretty neat.
^ That's us!  
Design No.186, from D.S. Hopkins, Late Victorian House Designs

Our Final Day

Thursday, April 7, 2011

Woke up this morning and looked out our kitchen window to these lovely visitors in our front yard.  Of course, seeing deer in Washington is like seeing trees...they're everywhere.  But it still gets some getting used to this early in the morning.

      Today is our last day, we've been up for over a week now and it's time to get back to the ranch in California and regroup.  Next visit Missy will come and our daughter Molly to help with more painting, and more odds and ends.  But for now, Mary and I are down to the wire.  Yesterday Mary spent the day painting the second bedroom upstairs.  She picked the color and went with Behr Ultra, Rejuvenate (light sage green) for the body, and Cottage White for the trim.
                                                                     (Bedroom 2)
      I helped her roll on the body paint while she ripped through the trim.  All the while Andy was putting on a second coat of sealing downstairs and our painters were still grinding away on the outside of the house.  After the main body paint was all rolled, I left Mary to finish up the trim and I started in on the master bedroom finally.  Missy had asked me to pick out a "cool blue", and with Mary's help we chose a great light blue called Cumberland Fog, with a dark blue trim (color name is lost on me at the moment).  Though I am usually not a fan of blue for a bedroom, once the paint dried and the trim was being painted it really came together, I was sold.  It definitely had more of that nautical seaside vibe to it, which fits in with our new PT lifestyle.

(Master Bedroom)
Unfortunately this picture was taken with Mary's phone, so it's not the best quality, and the trim is still all tapped off.  More (and better) pictures to follow once I get my camera unloaded!

    Tomorrow Mary and I are set to leave at 5am for our fourteen hour journey home.  Can't wait to get back home to share all the pictures and ideas with Missy to plan for our next trip.  Hopefully we'll be back up in a couple weeks.

Our main goals: 
1) Get the exterior painting finished. 
2) Get Andy to work his magic on the hardwood floors upstairs. 
3)  Pick paints for bathrooms, kitchen, and den area. 
4) Paint dining room, and the aforementioned rooms.
5)  Get 1 large pine tree obstructing views from one side of the house cut down.
(not an old tree, don't worry, it was planted from previous owners) 
6)  Work on getting a quote for fencing in the yard (got to keep our ranch dogs at bay)


First Week ~ The Floors

Tuesday, April 5, 2011

     After accepting Andy's estimate for the floors (Northwest Hardwood Floors), he set to work the very next day prepping.  Unfortunately there were a few complications involving the grinding process.  Andy had given the floors a test patch with his grinder and we all became aware of just how many times this original ol' Douglas Fir had been sanded down.  The nails were protruding between planks, which meant we either abandoned the idea of using the original flooring and look into laying down a new floor, or we manually hammer in every nail individually.  On top of this issue, there was the old almost plaster-like substance that had been used (who knows how many years prior) to fill cracks between the boards.  This old cracked white colored "stuff" refused to take any stains.  Decisions needed to be made on what exactly we wanted to do, stick with the original flooring and put in the hard work, or spend the big bucks on a brand new hardwood floor.  Regardless, Andy let us know this will be the last and final time this floor will be able to take a grinding.

     After talking everything over with Andy and many phone calls with Missy, we decided we wanted to keep the original floors.  So Mary, Andy, and I set to work chipping away at the grout between the cracks and hammering down nails.  It was hard work, I ended up buying knee pads to try and save myself the pain but it barely helped.  After two days of working section by section, Andy was finally ready to begin the fine sanding/buffing.  After a day of buffing, he began laying down the first coat of a nice amber seal.  We were so impressed by how well it turned out that we worked out another job with Andy.  Missy and I decided to keep hardwood floors throughout the upstairs as well.  As our next project we will remove the old (mauve colored) carpet in the upstairs bedrooms, and have the Hemlock floors underneath receive the same treatment as the downstairs.  Can't wait!


This is what the floor looked like in the dinning room. Uneven and covered with various stains.


Andy's equipment in the parlor after the first grinding.

After several passes with Andy's German built Panzer floor sander and a buffing with a fine grit mat the first coat of sealer goes on.

Interior Paint ~ Upstairs

Monday, April 4, 2011

This picture is of the largest room upstairs, the one that faces the front of the house.  Both bedrooms upstairs were a light pink color, with matching carpet (guess the previous owners really loved pink).  After much deliberation and confusion on colors to match a Victorian style bedroom set Missy had in the family, we finally ended up with a truly accurate Victorian tri-color scheme.

Unfortunately you can still see the mauve carpet in this picture (soon to be torn out), but this is almost the finished product.  Mary spent 3-4 days on this room alone.  Tapping off all the intricate molding around all three windows and trim around two doors (entry and closet).  We went with Behr Ultra again, using Fossil Butte for the body, Quiet Veranda for the upper portion and doors, and Japanese Maple for all the trim.

Update: 5/10/11

Slightly saturated picture here, but you can see the room now with it's baseboards in and NO more mauve carpet!  Andy did a wonderful job buffing and sanding down the original Hemlock.  We were so happy with how well they turned out.  Johnny spent last week working on painting the baseboards and installing them himself.

Exterior Paint ~ Phase 1 "Sanding"

Sunday, April 3, 2011

    My daughter Mary and I spend our first night in the new house on air mattresses upstairs. Mary took the small bedroom that faces Adams street and the southwest. I squat in the master bedroom with my queen size blow-up bed. We sleep late, not unusual for Mary bed rare for me.

    Mary began with cleaning and taping the parlor and I visit our new neighbor Pops. Pops is a real character, he lives across Adams street in a beautiful house built in 1889.  He knows everybody in PT (no exaggeration), he's always waving at cars going by, and has people stopping by for a chat on his porch.  He's a great wealth of local info, which is fortunate for us.  Pops gives me a referral for a local house painter. I make the call and by the next day Dave, proprietor of Paint Paramedics shows up and inspects the house for an estimate. Dave ends up giving me the name of a gentleman named Andy of Northwest Hardwood Floors, who refinishes hardwood floors. Soon I have both Dave and Andy lined up to start the process of bringing this old Victorian house back to its grander days.
Here the paint prep begins with disk sanders whirling away. "Watch out for lead!"

First Week ~ The Interior Paint

Saturday, April 2, 2011


      The colors of the inside parlor and great hall were all this rose/pink color (see bottom portion in the picture above).  Not only were all the walls this color, but the ceiling as well!  Mary and I spent days tapping off the wood stained trim, and partitioned the walls into a tri-color scheme Missy had chosen before hand.  Using Behr Ultra paints, we went with Cottage White for the upper portions including ceiling, Quiet Veranda (soft yellow) for the middle, and from Martha Stwart Collection, Feather Duster (greenish/gray) for the bottom.  We loved how it turned out.

We did rip out all the old (not original) baseboards.  They were too thick and seemed to make the room look smaller to us.  So finding new baseboards and then stain-matching is yet another project added to the list.

Upstairs Bathroom

Wednesday, March 30, 2011


  So the main Guest Bathroom upstairs was in interesting condition when we first arrived.  Starting with the soft pink rose colored walls (pictured here), and a white/pink/gray colored linoleum tiles (bleh).

  I spent my very first day working at the house (literally DAY 1), taping off the bathroom.  I couldn't stand the pink, it had to be changed asap!

  Missy had not given us any of her color choices for the bathroom, so she left the decision up to me.  I knew that unfortunately the linoleum was going to have to stay (for at least the first few months, or year) until money-wise they could afford to change it.

  So with that information at hand, my Dad and I headed down to Henry's Hardware to pickup a Valspar paint.  I'd brought a picture of the tile into the store to try and match some kind of color.  I ended up picking a color called "Beluga Mist", which was a medium/light toned gray.

   My Dad was suspicious of my choice at first, but once it all dried he was very pleased with house it turned out.  It's a nice cool color, and it makes the weird linoleum.  Since it is such a neutral color, it leaves Missy plenty of choices for accent colors for the shower curtain, towels, etc.

I complained to my Dad about the stained cream colored toilet seat (pictured ON the toilet) that doesn't match the white porcelain toilet, so he bought a new one for me to install!  Yay for new toilet seats!

Also pictured above you may notice the white legs of the sink, (in previous picture they were a silver chrome color), my Dad had the genius idea of getting a white spray paint and it really worked out well!

Escrow closes and we get to work!

Monday, March 28, 2011


     April Fools' Day and we now officially own the "McBeth House" in Port Townsend, Washington.  I hope we are not fools. The 1890's house is a bit of a fixer-upper, but a lot of work has been done by the previous owners.  Best improvement being that the house was raised up about 3 feet and a new basement and foundation were put in. New electrical system with outlets every 5 feet or so throughout the house. Steps were repaired, hand-rails added, rain gutters and many smaller improvements.  The inspectors have approved it for habitation, which was a huge relief to us.

    Missy and I were still on our ranch in California when we email signed PDF files to our real estate agent and escrow company.  We both began packing up tools, air mattresses, cups, plates, and flatware, plus several gallons of paint we picked out for the parlor, dining room, and great hall.

   Unfortunately, only my daughter Mary will be able up with me on this trip. Missy has to work with our daughter Lily on college stuff and Molly is still recovering from having her wisdom teeth removed.  Mary and I are excited to get to work though.  With my new Ford Transit Connect loaded to the gunnels,  we got a late start on Sunday and begin a two day trek up I-5 to Port Townsend, WA.


    We finally arrived Monday afternoon in PT, I eagerly pick up the keys to what I hope will be a new chapter in our lives.

Our New Queen Anne Victorian

Thursday, March 10, 2011


Previous owners have cycled through two different paint schemes.  Including a gray and red motif, and this most recent (though probably 15+ years old already) light pink with purple highlights.  We are not fans of the old pink, and one of our first projects will be to have the exterior painted.